Foreword:
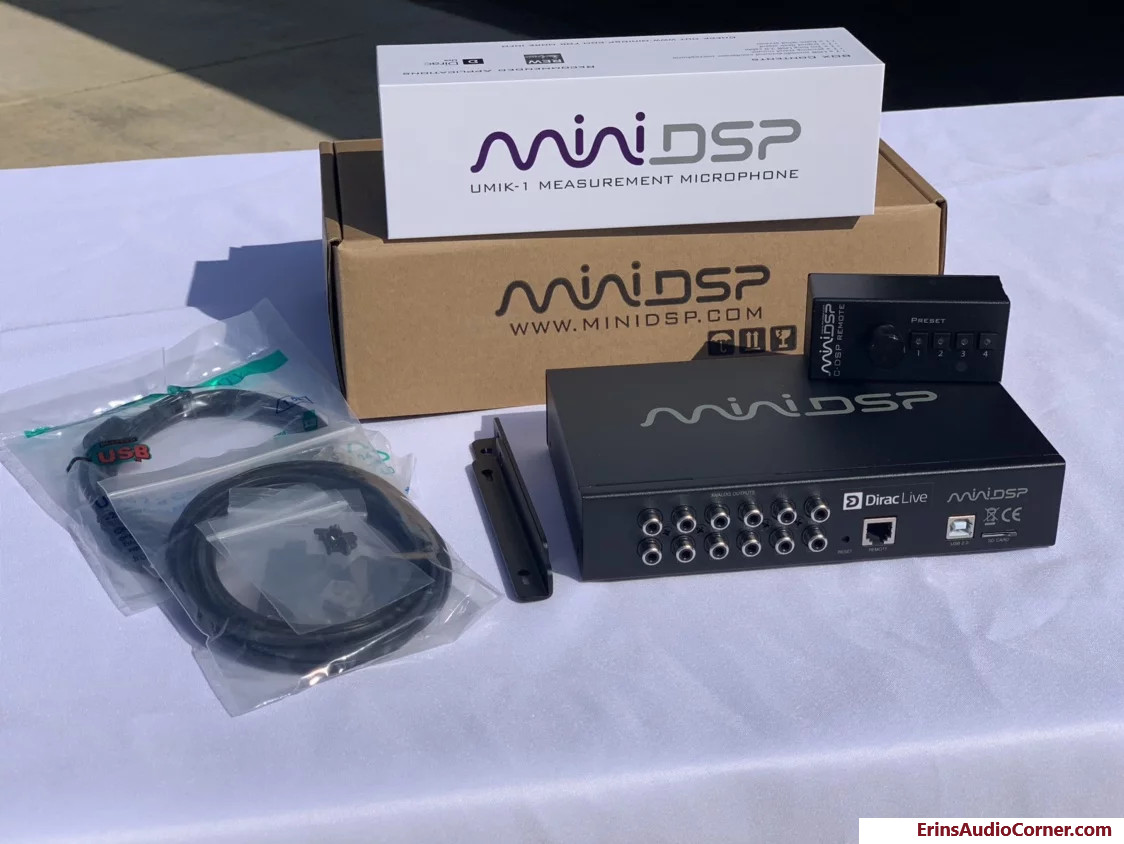
Up for review is the MiniDSP C-DSP 8x12 with Dirac Live. This can be purchased directly from miniDSP.com or through Parts-Express.
While this review is intended to provide insight in to the use and subjective opinion of the end result of the MiniDSP with Dirac Live, it is not intended to be a full tutorial on how to tune with Dirac Live. I have linked various documents for that purpose. My discussion in that regard will only be intended as supplemental. And, obviously, as with anything relating to audio in a room, your results may differ from mine.
Intro:
DSPs in car audio are a necessity. This product’s inclusion of Dirac Live takes what was normally a tough and arduous task wrought full of confusion for newcomers and transforms it in to a relatively easy to use package with incredible results.
For some number of years now, MiniDSP has been producing some very affordable, yet powerful products for home and car audio enthusiasts alike. I tested an original MiniDSP 2x4 way back in 2010. Though, at the time it was not quite ready for full scale implementation for the car audio market, it was an exciting glimpse in to what the future may hold. Fast-forward to now, August 2019, and I am holding the future almost literally in my hands with the MiniDSP C-DSP 8x12 with Dirac Live.
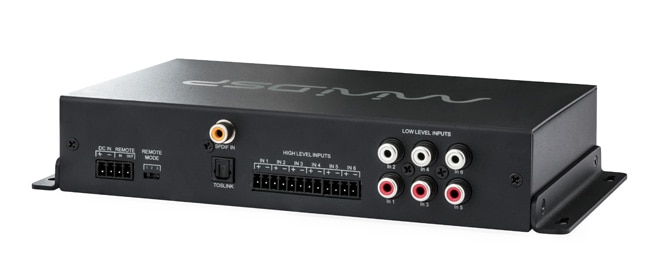
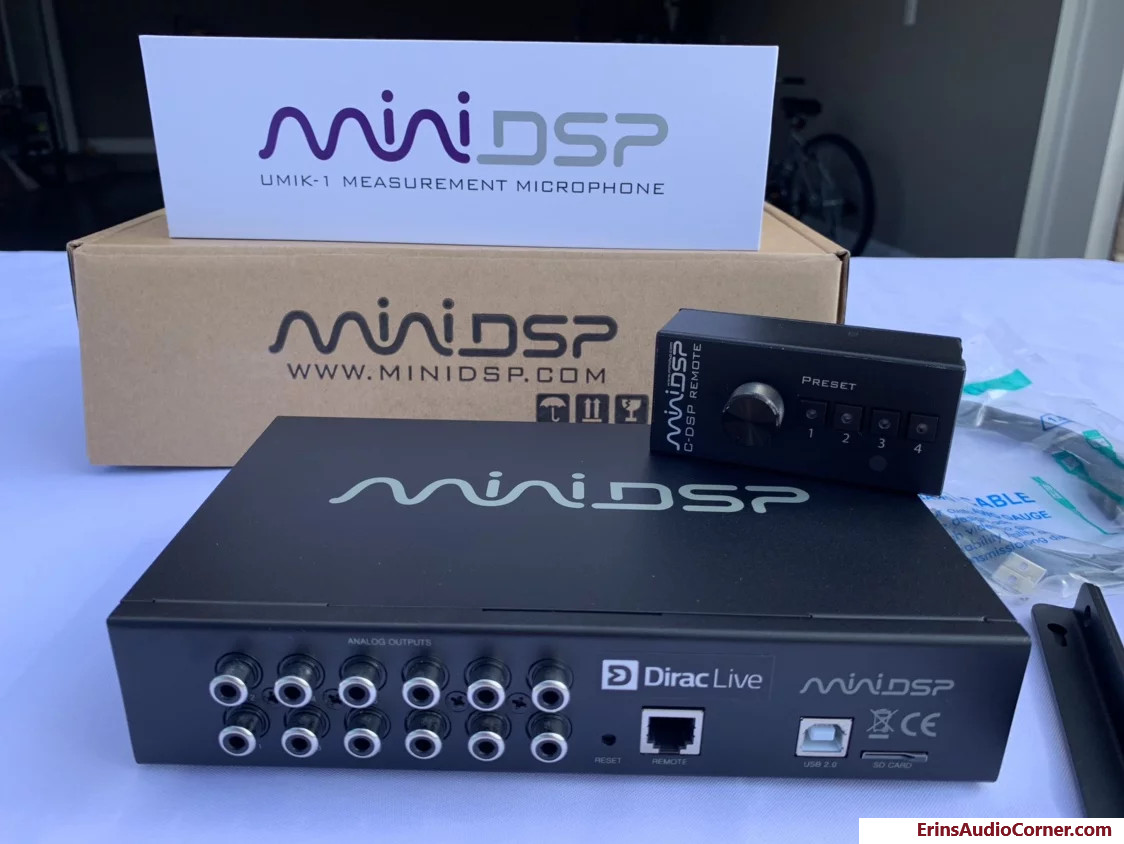
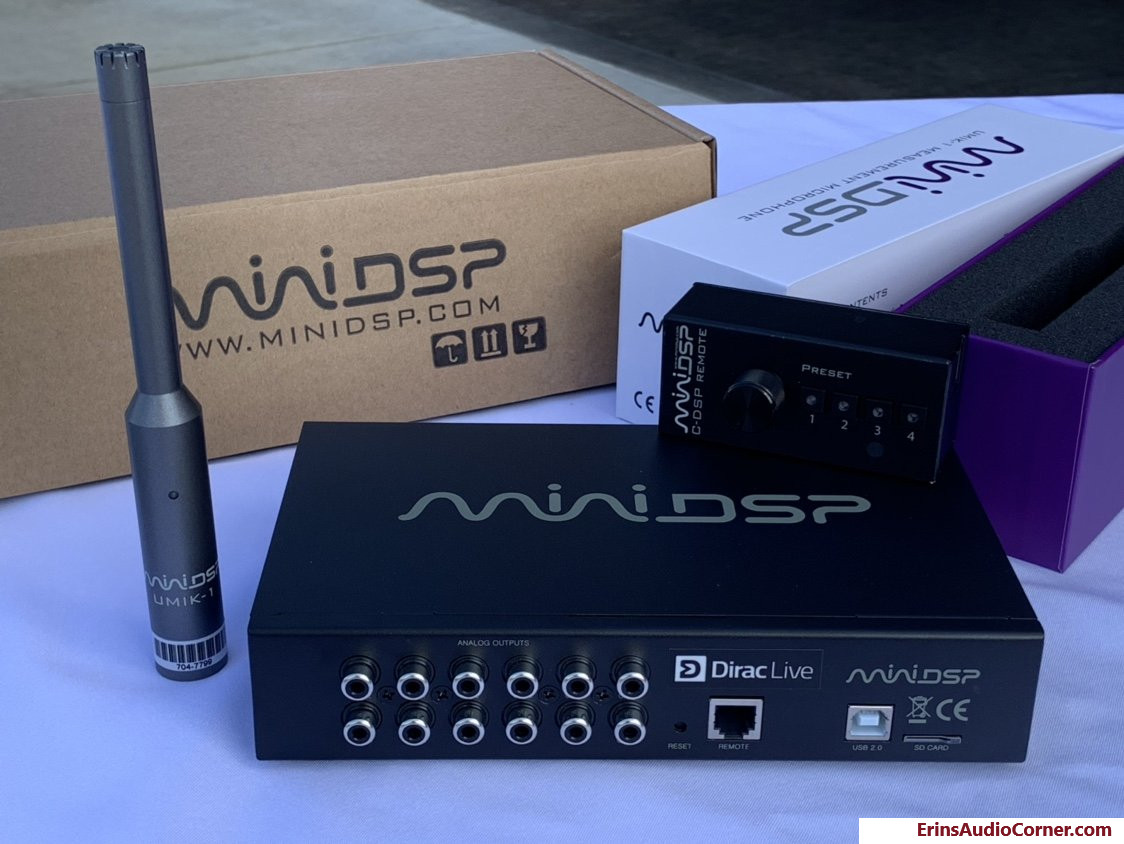
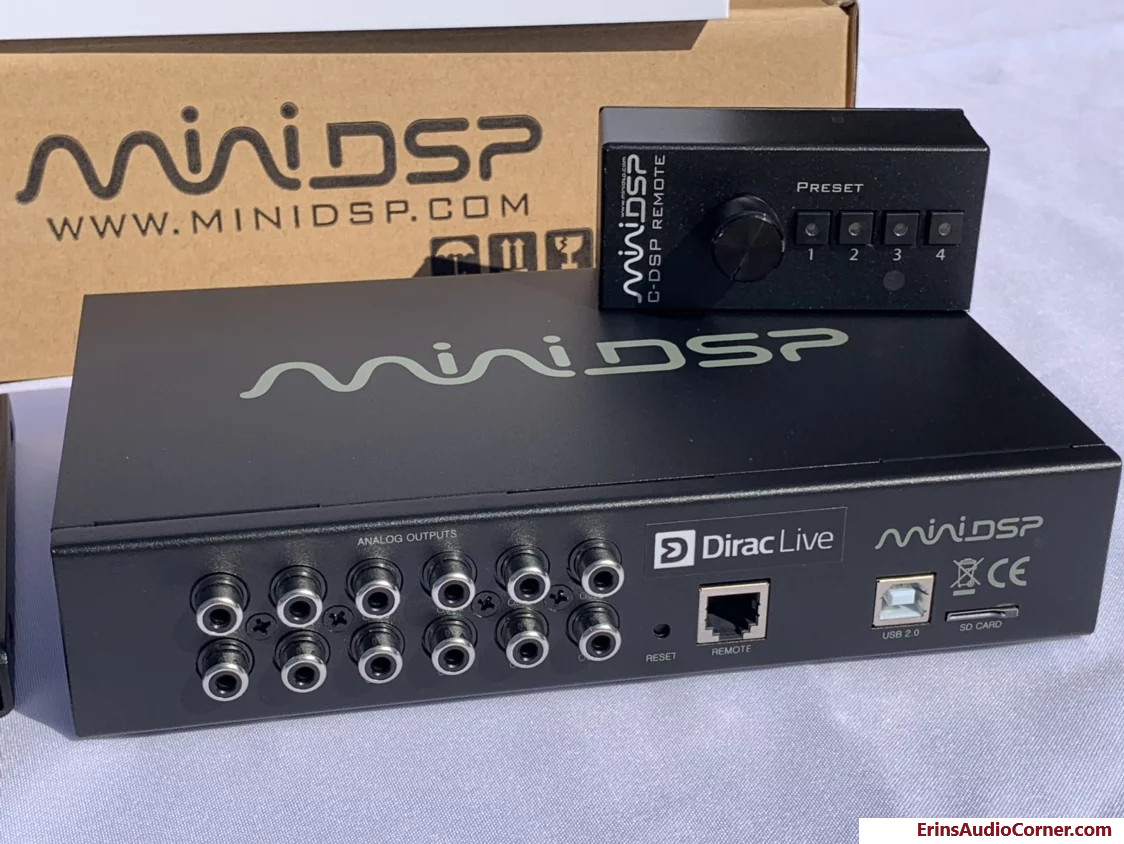
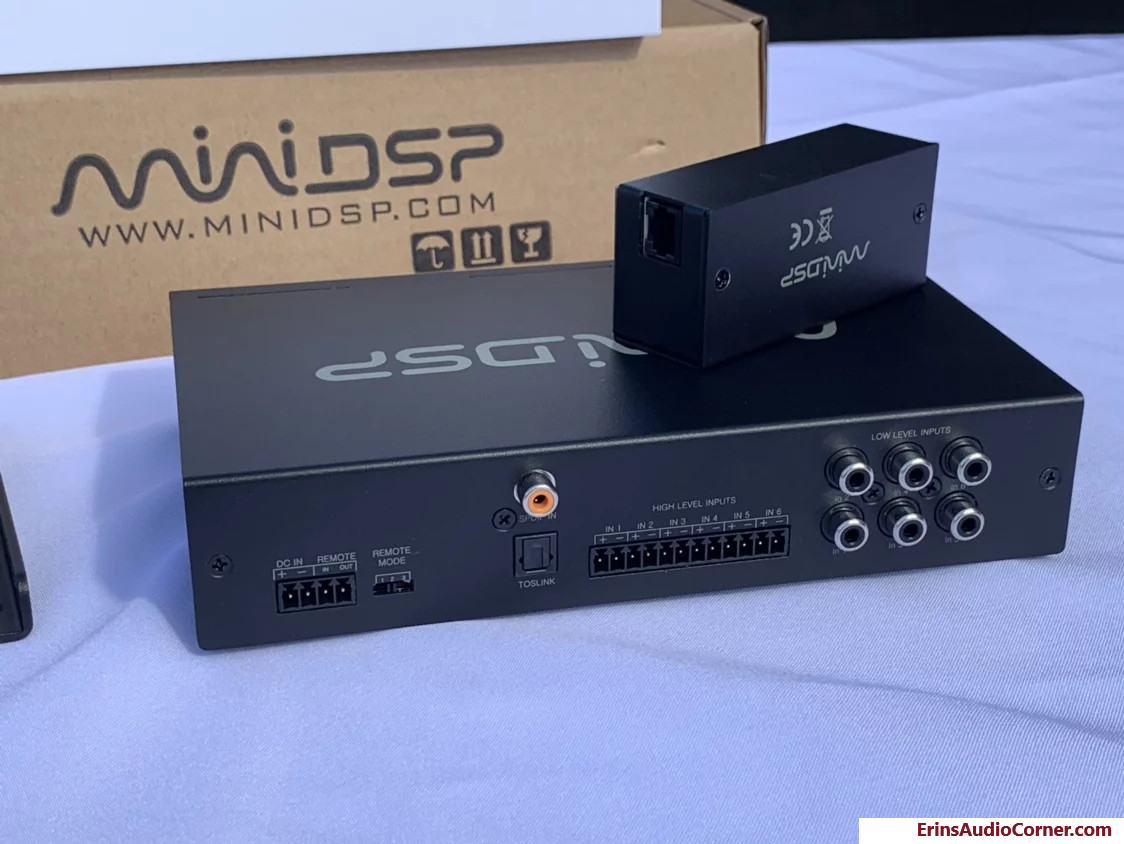
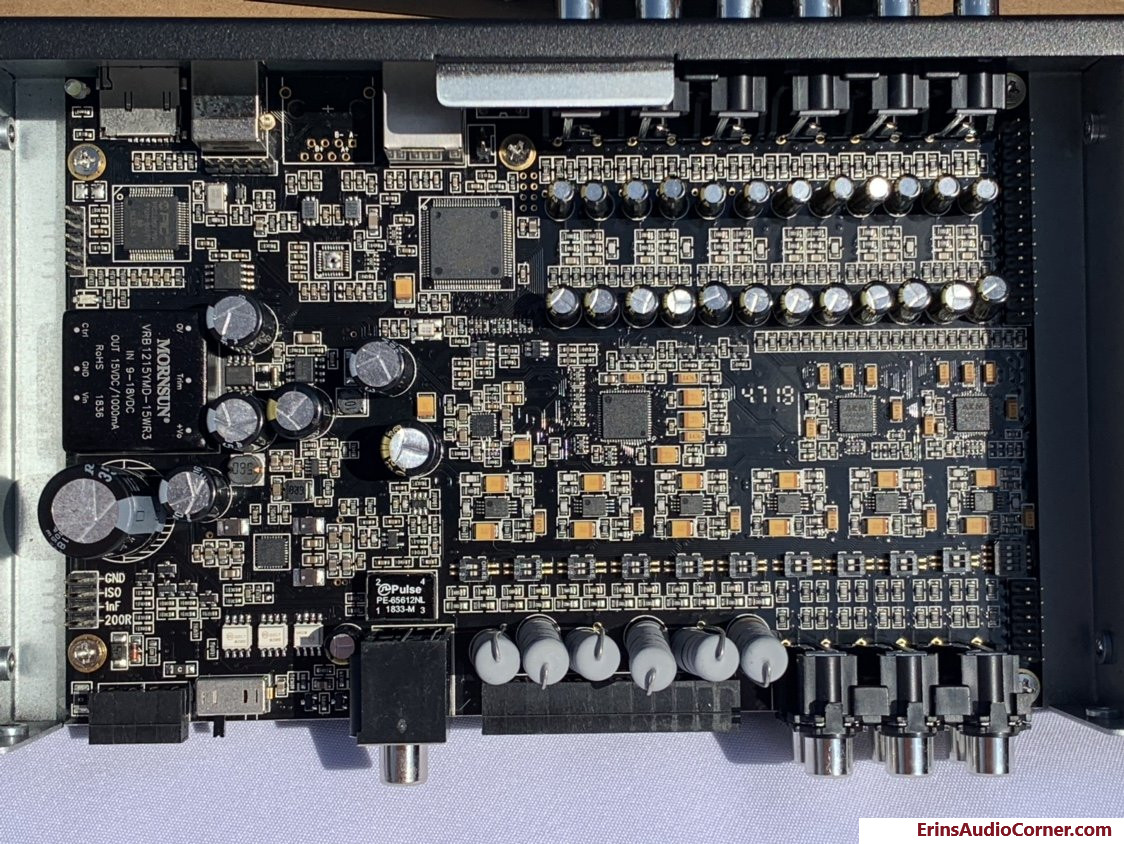
On its own the C-DSP 8x12 is an excellent product and the $499 MSRP makes it even more enticing. There are the staples of what we in car audio (and home audio) have come to adore such as time delay, level adjustments and parametric EQ. With the 6 analog inputs and 12 analog outputs, it’s more than capable of taking a 2-channel input signal and splitting that up to 3-way active (tweeter/midrange/midbass) + subwoofer and still have enough channels to incorporate differential rear fill for those who want to do that. Then there’s the inclusion of a remote for preset selection and subwoofer volume control. As capable as the MiniDSP C-DSP 8x12 is on its own, what really steps things up to the next level is the addition of Dirac Live (add-on cost of $400 for the license and UMIK-1 measurement microphone). The C-DSP 8x12 with Dirac Live takes the MiniDSP 8x12 v2 and adds the following features: miniDSP is proud to introduce the new flagship C-DSP 8x12 DL in-car digital audio processor. Dirac Live® room correction, a 400 MHz SHARC floatingpoint processor and 32-bit AKM converters with –107 dB THD+N specification deliver pristine high-resolution audio in any cabin environment. Comprehensive I/O includes six differential low-level analog inputs for low noise pickup, high-level inputs for connection to head units with power amplification, and stereo SPDIF and TOSLINK digital inputs. On the output side, 12 RCA outputs combined with a full eight channels of Dirac Live processing make the C-DSP 8x12 DL adaptable for active crossover systems as well as multichannel/surround installations with subwoofer integration. The above information comes from the product page here:
This review will focus on the combination of the MiniDSP + Dirac Live.
Dirac Live: What Is It?:
In a nutshell, Dirac Live (DL) is an automated room correction utility. It works to adjust speaker response issues in both amplitude and time based on the speaker response and room’s influence. Depending on the application it can be used to measure and correct a basic 2-channel stereo or a 7.1 surround sound system. You use a microphone and measure the system response at various positions (depending on the goal) and DL will take it from there. The ideal result is a speaker that acts as true to a point-source (single object emanating sound) as it can; within the limitations of the speaker itself, of course. What makes Dirac Live work is complicated. I won’t pretend to be versed in the algorithms that are running behind the scene and Dirac themselves aren’t willingly providing the engineering level details. However, they do provide a medium level explanation of the system on their website, quoted here: By using mixed-phase correction we can enable impulse response correction. A loudspeaker’s impulse response affects staging, clarity, detail and all spatial aspects of the sound. Dirac Live® is unique in that it improves the impulse response throughout the listening area, not just in a particular zone. The Dirac Live® algorithm suggests a target response appropriate for your listening environment and speakers, which you can of course adjust to your taste using our simple graphical interface. More information on DL can be found throughout the internet. My goal here isn’t necessarily to explain how DL algorithms work but rather to provide my real-world results of the final product in my car. For those who want to know more about how DL algorithms work, here are a few links to springboard your research: https://live.dirac.com/technical-information/ http://diracdocs.com/on_room_correction.pdf https://pdfs.semanticscholar.org/faac/9d619123c532938a514c77f966df10f03e91.pdf
In the above quote, it is important to key in on the “target response” aspect. DL can be set to target any curve you desire. Depending on your own subjective preference you can tailor the final sound to be a tad more bass heavy, to be a bit brighter, or any other sound you wish to achieve. This will be discussed in more detail later.
MiniDSP + Dirac Live in Car Audio:
In the sound quality side of aftermarket car audio world there are predominantly two types of users: Casual hobbyist who just wants better sound. For this user type, the easier the process the better. There’s little desire here to continually swap gear in pursuit of the highest level of sonic nirvana. Instead, they are looking for a solution that nets them the best possible outcome the first time with little to no need for upgrading or fiddling with settings. Hardcore enthusiast who is prone to continual ‘tweaking’. This user type may also be prone to gear swapping just to “scratch an itch” and/or to improve their own understanding and ability to build a high fidelity sound quality system. In general, Type 1 users may not attain the level of fidelity as Type 2 users. This isn’t to say it cannot be done. Moreso, the level of desire and dedication to pushing the envelope as technology increases just isn’t there. If they have a 95% solution in year 2019, odds are they won’t pursue the 98% solution in year 2020. On the flip side, Type 2 users are always chasing the infinitesimal improvement. Making that 95% become 98%, then 99% … but never quite reaching 100%. (All percentages here are for example only, of course. ;)).
I classify myself as a Type 2 user. I enjoy the “chase” so to speak. This is what helps me learn and what helps me be a better tuner. Years back, I had experience with JBL’s MS-8 and while it was a solid step forward, there were some things it did that I just didn’t care for and ultimately I felt the imaging wasn’t as focused and placed as accurately as it should/could have been. There have been other auto-setup systems along the way (such as Pioneer’s auto-eq, Alpine’s Imprint, etc). These devices have always done one thing well but never have fully encapsulated a “one and done” setup. For the most part, tonality was always acceptable but the imaging wasn’t up to par with a manual tune. At least in my experience. So, naturally, I’m somewhat predisposed to turning my nose up at an “auto EQ” device as new ones arrive. Dirac Live has changed my mind. Based on my experience with the combination of the MiniDSP + Dirac Live, these two types of user could be sufficiently merged so that someone in Type 1 achieves 98% immediately while those in Type 2 may be happy with the immediate 98% results and choose to not further chase the never-attainable 100% goal.
With that said, it is important to understand that DL is not impervious to all issues. It isn’t perfect. While my results were quite impressive, the user has to understand that DL cannot fix all issues. For example, if you have set up your subwoofer channel to be out of phase (acoustically) with your midbass, DL will not be able to fix this. Let’s dig in to the setup of the MiniDSP and Dirac Live so we can see some ways to get the best results.
MiniDSP + Dirac Live Setup and Implementation Example:
The majority of sound quality enthusiast systems are comprised of a 2-way or 3-way active “front stage” along with a subwoofer(s). Either of which the MiniDSP is more than capable of handling, as previously discussed. My system consists of a 3-way active front stage with trunk mounted subwoofers in infinite baffle configuration. I’ll provide results based on this kind of system.
Before I get too far, let me establish this one important term: Speaker. A ‘speaker’ to Dirac Live should be what would typically be considered a speaker in home audio: a device that covers 20hz to 20khz (as best it can). While one can use DL to calculate time delays and target an individual curve per each individual drive unit in an active system, I have found DL to perform best when processing the system from a left/right ‘speaker’ level rather than processing each individual drive unit of an active system. Meaning, the ‘left speaker’ would be the combination of the left tweeter/midrange/midbass and, in my case, the subwoofer (with signal from the left side only, in this example). The same for right side. If you are running rear speakers then the same applies. MiniDSP also advocates using the MiniDSP before DL; letting DL essentially clean up the combined active-driver response as a single speaker.
To be honest, my first few attempts with the combo were trying. That’s because I didn’t read the Application Note(s) MiniDSP provides. I mean, who does that? As a Type 2 car audio guy (tinkerer) I am naturally inclined to set it up my way and try how I think it should be done. I could tell you what I did wrong but to keep confusion down I won’t. Instead, I will focus on how to do it right per the Application Note. Before going further, I suggest you at least give a cursory look through the Application Note to familiarize yourself with the basic pre-DL setup of an active system. We will discuss what we do with DL a bit later. https://www.minidsp.com/applications/digital-crossovers/active-speakers-with-ddrc-88bm
To summarize the steps in the application note, what you have to do is set your system up in the MiniDSP first. Then run DL. Set up your time delays, set your crossovers and do some EQ for each active channel. What you’re trying to do is get the best results you can with a little pre-DSP work so that DL can have a great baseline to start with. As I mentioned earlier in this review, if you are providing DL a scenario it cannot correct (such as “hole” in the crossover between two active drivers) then you are starting from a faulted position already and the results will likely not be as good as they could be.
The MiniDSP in my car was connected as so:
- Headunit –> MiniDSP Channels 1 & 2 Inputs
- MiniDSP Channels 1-3 Outputs –> Left Amplifier (left tweeter/midrange/midbass)
- MiniDSP Channels 4-6 Outputs –> Right Amplifier (right tweeter/midrange/midbass)
- MiniDSP Channel 7 Output (Summed from Channels 1 & 2 Inputs) –> Subwoofer
The application note states to:
- Set up the routing menu
- Equalize the speaker
- Add Crossover (and set time delay; provided in another linked application note)
Numbers 1 and 2 above are so specific to the end user that I won’t be discussing those. That said, you should, again, be providing DL the best baseline you can which means using the correctly sized enclosure and making sure your installation is up to snuff (no rattling door speakers, for example).
This gets me to #3: Equalizing the driver response. Now, to be honest, one should also take the time to pre-measure each active driver’s response and then use broad strokes to flatten out any large peaks or anomalies seen. However, I didn’t do this my first go-round because, frankly, I was too giddy at the thought of this new toy and I went straight to Step #4. But let me add some info about this step here and explain why I think it’s still important to do. The Schroeder frequency. Home audio enthusiasts and scientists often argue that no correction filters (manually or automatically generated) should be applied above the Schroeder frequency (the point at which the wavelengths are equal to or greater than the room’s dimensions). To quote Linkwitz’s site: The frequency fs is also called the Schroeder frequency and denotes approximately the boundary between reverberant room behavior above and discrete room modes below. What this means is that, essentially, above the Schroeder frequency the sound waves are shorter than the dimension of the room and are bounced around (reflected). Below the Schroeder frequency the sound is unable to move and is basically static because the wavelength is so long it can’t move, thus creating “modes”. In a home the rooms are larger and the Schroeder frequency is usually in the 100-200hz region. A car is smaller and therefore the Schroeder frequency is higher; usually 300-400hz. Okay, so back to the notion of not applying correction to speakers above the Schroeder frequency… The premise behind this school of thought is simply that you should already be using speakers with good response (nice linear on-axis with a desired directivity and no aberrations off-axis) and have them placed optimally in a well-damped room. In this ideal case, the room’s only serious detrimental impact would be below the Schroeder frequency and therefore this area would benefit from correction and any correction above this would be wasteful/potentially harmful to the sound. Well, unfortunately a car isn’t a home. And in a car, everything around you contributes to the response and effectively becomes a baffle - that flat (or sometimes not flat) panel which your speaker driver is mounted to in a home speaker. You can take the world’s best speaker drive unit, pluck it from a home speaker cabinet and plop it on your dash, a-pillar, or anywhere else in the car and you’ll have a vastly different response. Why? Not just because of reflections or modes; but also because of what is near the speaker. In a well-designed home speaker the baffle is part of the design. The baffle actually has some engineering thought placed in to it. It helps to reinforce the sound up to some frequency and therefore drives the resulting response. In a car, the pillar, the dash, wherever you place the speaker, acts in the same manner: it alters the response of the drive unit. You may have heard the term “corner loading” when talking about subs. It’s the concept of placing a subwoofer in a corner so the sound is reinforced by the corner walls. This is the same for car audio. In fact, the two effects in home audio (baffle and corner loading) are essentially the same in the car; especially the lower the frequency played by the driver. This is why car audio benefits from using auto equalization higher in frequency than most home audio enthusiasts suggest. Because you never have the “perfect” speaker response to start with: the room dominates the response nearly throughout the entire audible range and has to be considered part of the “speaker”. With all of this in mind, you can understand why MiniDSP encourages us to pre-correct the response of the “speaker” before we run DL, especially when used in the car environment.
Step #4: Set up my crossovers for each speaker driver. With the varied amount of options out there in both install and driver, there is no one-size-fits-all solution to crossover assignment. However, the important thing is to set the crossover point and slope to protect your speaker for your desired volume level. A portion of Step #4 includes setting time delay. The application note linked above suggests doing so by using a tape measure. This is where I deviated from the application note. Instead of measuring each speaker driver’s physical distance from my listening position, I ran DL and let it tell me what the calculated time delay values were. I then used those and plugged them in to the corresponding output channels’ time delay. I figure doing this might offer me a slightly more accurate time delay value vs measuring. A couple inches’ offset in time isn’t a problem for bass but for tweeters and midrange blending, it does matter. I can’t say with 100% certainty the results were better than vs using a tape measure to calculate distance/delay but it’s easier. To do this, you’ll need to configure the input tabs for DL to be assigned to each individual speaker. Once you do this, you’ll need to re-assign the DL channels so they are correcting for the combined active channels’ response (i.e., left and right ‘speakers’ as I discussed earlier).
So, now that the basics are set, it’s time to run DL. Below is a link to the User Manual for setting up DL: https://static1.squarespace.com/static/55c8a274e4b09cb562cd3ea0/t/565c6062e4b01110e1e11c4f/1448894562342/dirac+live+room+correction+suite+-+user+manual+v1.1.pdf
Additionally, MiniDSP provides an Application Note on using DL: https://www.minidsp.com/applications/digital-room-correction/ddrc-24-for-2-1-system
While the manual should be sufficient for most users, I’ll add in some anecdotes about my experience: I used the “chair” position in DL because I am only concerned with the sound at my seat. Given our off-center positioning in the car, you can’t really have both seats sound fantastic. You choose a compromise of either excellent sound at one seat or (at best) good sound at both seats. The latter is really only in regards to tonality; the imaging will never be the same from both seats using standard stereo efforts. DL procedures instruct you to first measure at the main listening position (MLP). You then are instructed to measure a number of other times from various locations within the seated area. For what it’s worth, I initially tried measuring from a single mic location. I found measuring from 9 positions worked best. I can only presume because of the MLP weighting discussed below. So go ahead and measure from a few positions like DL’s software instructs you to do if you want to get the best results you can. The first step, the MLP measurement, is crucial because DL uses this initial measurement as well as later measurements to sort out the good, bad, and ugly. So make sure to place the mic at a location that your head will be for the MLP measurement. For later measurements, based on my experiments and with some slight understanding of what DL is doing, I recommend to place the microphone in a 1 x 1 foot square and measure somewhat randomly. It is worthwhile to note DL does not average the responses. DL isn’t looking for a specific pattern here as much as it is simply using the results of each measurement to determine what needs to be fixed and what doesn’t, using the MLP measurement as the baseline.
As previously mentioned, I tried to use DL to measure and optimize each individual driver to a specific target curve a number of ways. The truth is, it just didn’t work well for me. My best results were met by using DL in stereo mode with the subwoofer getting half of the summed signal as it was summed by combining Left+Right in the routing tab. DL suggests this and my results back this as being the best method. But, again, it might be useful for you to first run DL on each individual driver to let DL tell you the time delay and level values to set for the corresponding output channels in the MiniDSP. Then re-run DL in 2-channel mode after you’ve made those adjustments.
…..
Now that we have done all this and gotten DL to optimize the left and right response it’s time to listen. Audio is always subjective. Sure, we all understand there’s a goal of achieving a reference level playback system but the truth of the matter is the environment plays a huge role in what we hear that there isn’t a single target curve that will give you that. For that matter, you may not necessarily want that. So, let’s say you’ve listened to the system results and you just didn’t like it. You want more bass. Or you want less bass. Or you want more “presence” in your highs. At this point you have a couple options: a) revisit your MiniDSP settings; crossover, level adjustments, EQ, etc. Maybe there’s something wrong in those settings that you missed. If you’re confident you have your active channels set up appropriately then b) it’s time to reconsider the target curve you chose. Of course, the solution could be a combination of both. The luxury of having the MiniDSP + DL is that you can make adjustments in the MiniDSP and/or re-run DL to match a different target curve. This is where the provided remote with ability to switch between four presets comes in handy. Now, you can use different settings, store them in separate presets and call them up later. You can try different curves and find what you like. Or, let’s say you want to have two different tunes: one for cruising with the windows down and one for sitting in your driveway with the windows up. You can set up a preset for each of these. And the best part about this is that, since DL is targeting a specific curve, you won’t feel the need to reach for the subwoofer level adjustment and crank it up, which would otherwise wreck the midbass/subwoofer blending. Even when you’re cruising at 55mph with the windows down, if the sub is pulling to the rear it lessens the enjoyment factor (at least for me).
When I was using DL I tried a few different curves. Initially, I replicated my “manual” tune curve and had DL match that just to see how well it could match what I already had via my manual tune. It did a really good job of matching the tonality curve. Then I used the “Wisdom” curve provided with the DL software and modified it a bit to have a more boosted lower frequency response. I actually preferred this tonality curve over my own personal “manual” tune’s tonality curve. Here’s a screenshot of the left and right measured response (light blue) vs the DL targeted - modified Wisdom - response curve (orange) and the final, DL optimized result (green):
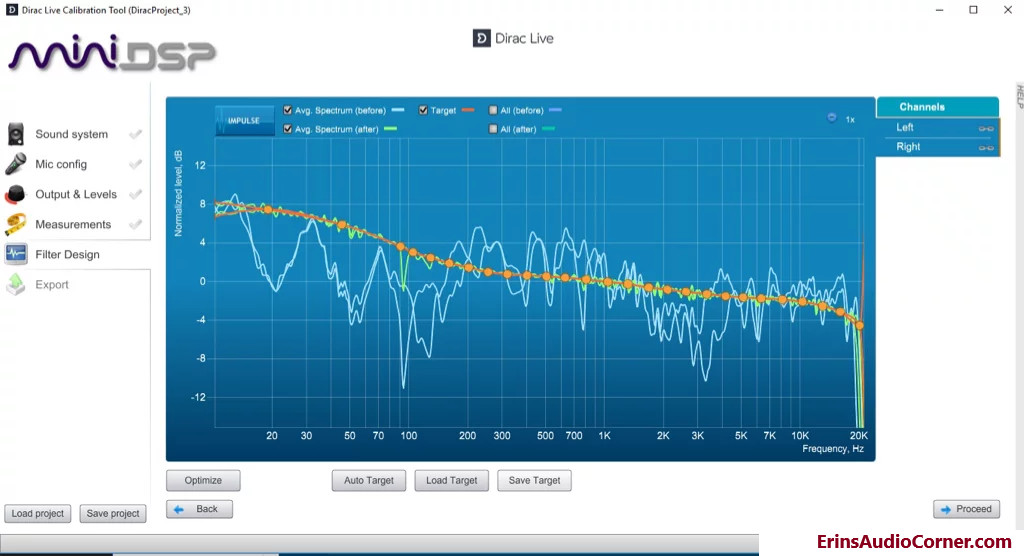
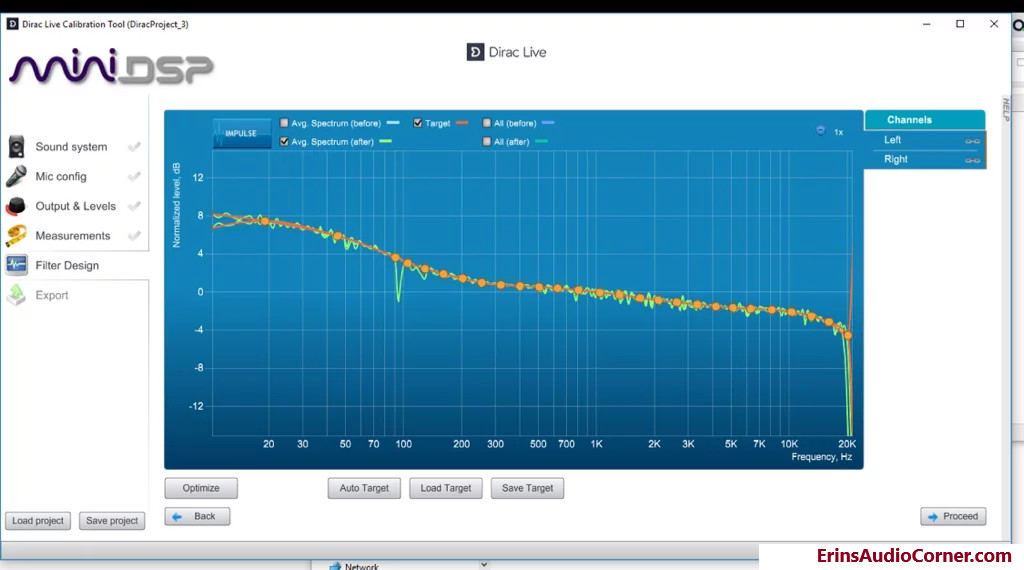
Here’s the same screenshot but of only the DL targeted - modified Wisdom curve (orange) and the optimized response (green):
Random Thoughts:
From what I found, DL has an internal delay of 1.30 milliseconds. This isn’t important if you run all your signal through DL. However, it is important if you were to use DL for only some channels and not others.
I don’t have a passive system. I’d be curious to see how well DL works with a system using stock passive crossovers in the front stage, especially when the midrange and tweeter are separated by more than an inch or two.
Target Curves: There is no “one size fits all” solution. I implore you to try a few different settings and try to factor in how your system is set up and what components are used to help you determine a target curve that is logical for your situation. For example, I wouldn’t tell someone using a 4 inch wideband to target a response that is flat or has a rising response above 2khz because the wideband is beaming above this point and it’s response is naturally falling off as you go further off-axis; shooting for a flat or rising response above the beaming point could introduce distortion if DL were to try to boost the signal or it may simply limit output volume in order to boost the upper end. I think the parts of the system should dictate the response. I don’t have the empirical data to prove this notion, however.
Final Impressions:
My contempt toward automated DSP boxes has been quelled by the combination of the MiniDSP C-DSP 8x12 + Dirac Live. This combo wasn’t the hardest thing to use but wasn’t necessarily second nature, either. Still, once I got the process down and understood the way DL worked I was nearly able to achieve in 15 minutes with DL what took me hours to achieve manually tuning my system (maybe that just means I stink but I hope not). You can try different setups and, depending on the complexity of your setup combined with what you’re giving DL to work with (i.e., the pre-DL tuning aspect) you may not have as fruitful results. That said, my setup is very similar to the majority of aftermarket sound quality car audio systems these days.
The end result with DL for me is: The imaging and focus is excellent. Especially higher in frequency. The image is rock-stable and I didn’t notice any wandering of the vocalists as they would carry notes higher or lower. The tonality, again, is up to the user but after a few iterations what I ended up with was excellent. In fact, using DL enabled me to find flaws in my own manual tune and improve them. The depth is impressive; my car seemingly lends itself toward good depth (not bragging, just relaying feedback I routinely get) but it’s improved with this DL tune. Basically, everything above about 300hz was impeccable. Which, by nature implies below 300hz wasn’t excellent. Ok. Why? So, midbass in the car is tough. The width of the car is right around the wavelength where most midbass tops out which means that what you wind up with is a series of peaks and nulls from each side. Some of these peaks/nulls complement each other when played in stereo and they help to fill in well. But you are still left with some that draw attention to themselves in one way or another. I spend the overwhelming majority of my time on tunes focusing on midbass and sub. Almost to a fault. So, I don’t expect DL to nail this area but I can’t give it a complete pass, either. So, let’s talk about that… There’s still some left side bias towards the ~70-80hz midbass suckout. Every car has this suckout somewhere in this frequency range. It’s more noticeable especially in the cars that cross their midbass too low. That’s why I cross my sub a little higher than most and let my sub fill in this null to some degree. As expected, DL cannot fix this issue but I believe with some additional time and experimenting with crossover frequency and slope I can get DL to at least mimic what I have with my manual tune. Additionally, the same thing that drives the 80hz null drives the other modes in the < 300hz region and, unfortunately, there’s just not much DL can do to fix it. In order to really do anything here, I think DL would need to measure in stereo and use artificial intelligence to determine how to adjust the EQ to balance the peaks/nulls. Of course, with the MiniDSP I can go back in after the fact and make corrections to the left and right midbass channels. And, if I’m being honest, these kind of issues wouldn’t bother the large majority of people. I haven’t heard a car with what I’d consider “perfect” midbass yet. So we are all fighting this fight. Therefore, I’m more apt to overlook this troublesome area but the fact that I still can do this better will not permit me to ignore it completely. While the left/right midbass imaging wasn’t what it could be, the subwoofer tonality and blending to the midbass was excellent. No pull to the rear (in my final iteration). No overhanging, droning, resonant notes. Just clean bass.
Based on my experience with this combo thus far, I believe for a newcomer this combination of the MiniDSP + Dirac Live is a definite recommendation. Heck, forget newcomers… I have years of experience and the combination provided me with a tune that comes close to my own in less than 15 minutes. Even though it’s not quite perfect, I am legitimately impressed with the results of DL in my car. It doesn’t completely outdo my own manual tune with hours and hours of time spent but it gives it a run for it’s money, no doubt. I’d have no problem recommending this but with the caveat that if you feed Dirac Live something it can’t fix like an hole in the response or a poorly designed enclosure then you may not be as pleased. All of the components work to create the whole; if you have issues with the system before DSP then you can expect to have those after DSP. However, if you have taken the time to build and install the components in an optimal manner (as optimal as it can be in car audio) and take the time to pre-configure the speaker driver’s responses and interaction before DL I am confident you will be very, very happy with what Dirac Live can do. And while I can’t say with 100% certainty the MiniDSP + DL combo will be the end-all solution for everyone, I can say that I think it’s certainly worth giving it a shot.
Edit: 02/06/2020
I am continually asked about this review: “should I get this or the Helix (enter DSP model here)?” I expected I would. But I purposely left out a comparison in my review simply because you’re comparing apples and oranges to a large degree. On its own the miniDSP CDSP 8x12 has less features than the Helix models. The miniDSP also costs less. However, as I state in the review, my focus is on the combination of the CDSP+Dirac Live. In that regard, you’re essentially comparing two different products: a manual tuning product (Helix, etc) vs a mostly-automated tuning product (Dirac). If your question is “which one should I buy”, then I’ll answer you with a question: “How good a tuner are you?” If you fancy your own prowess in tuning then manually controlling everything may be better for you. If you don’t, I think the miniDSP is a great product and absolutely worth consideration.
Some parting shots:
End
If you like what you see here and want to help me keep it going, there’s a Paypal Contribute button at the bottom of each page. Just provide what you can. Every little bit is truly appreciated.
You can also join my Facebook and YouTube pages via the links at the bottom of the page if you’d like to follow along with updates.
Thanks!